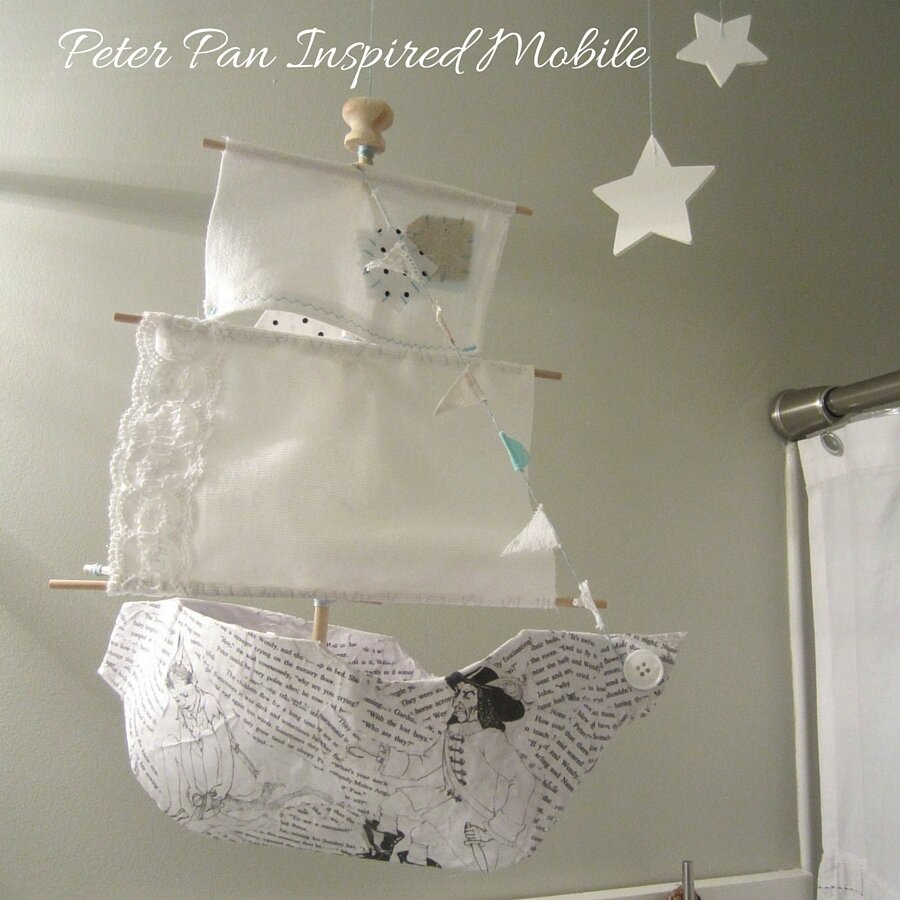
If you ventured over here from my Pirate-Inspired Boy Bathroom, then you know that while I was in the midst of decorating the boys’ playroom bathroom, I found and fell in love with Ann Wood’s Boat Mobiles. They are incredibly beautiful, and I thought something similar would be the perfect addition to the bathroom. Ann Wood does provide a template for her mobiles that you can use (click the link above if interested) but I did not buy it. I am cheap when it comes to my projects, especially if I feel like I can figure something out on my own, and being a math teacher, I figured I could design some sort of pirate ship that would work.
I did do a little research, however, before I started, and found that cereal box cardboard was suggested. I immediately went to our pantry, grabbed the cereal box most empty, and got to work.


I sketched a few pirate ship side views on paper until I got one that I was happy with, and then traced it on one side of the box (with the bottom of the boat touching a crease in the cardboard).


I tweaked the hull a little at this point, snipping here and there, adding a little curve to the top, until I got a look I was happy with, and then I taped either end together using masking tape. Once the ends were together, you have these two gaps on either end.


I sort of just played around with some interior pieces I could add to seal in the gaps, while also helping to push out the sides to create form. This was really just trial and error (me playing around with some cardboard). If you look at the picture below, you can see a “leaf” shape. That’s the gap being held against the flat cardboard, so I can trace it.

You can see where I traced with a pencil a few times to get a decent shape to use to fill in the gap.

I did this for both gaps, and then made little foldable tabs to use around the shape.


Then I used a lot of masking tape to secure it all together.

A lot…


Once I had the bottom good and taped, I created the deck using more cardboard and added a dowel rod as my mast.

More taping…

Once I had a good solid shape to work with, I was ready to paper mache. I will warn you that I have not paper mache’d since the seventh grade, so I had to go online and research a few recipes.
I chose the boiled flour and water paper mache recipe because it was supposed to dry clear. Hmmmm….

I added my flour to the boiling water way too quickly, and my batter was very, very, very lumpy.
I used the mixture to add a few pieces of shredded computer paper to the hull, but was not happy about the amount of flour lumps remaining on the ship.
Hubby suggested throwing it in a food processor, which I happily did, but then while the mixture was whipping away, he warned me not to use it too much as it would add air bubbles to the mixture. Grrrrr.
With a lumpy, but not-as-lumpy-as-before mixture, I got to work paper mache-ing. I covered the entire base with computer paper. Everything I had read said to make sure it dried thoroughly or it would mold inside, so I stuck it upside down in one of our floor vents overnight, and let the AC work it’s magic.
The next day, I added another layer, this time using a matte varnish. Honestly, if I were to do this project over again, I think I’d use this the entire time.

The ship spent another night in the floor vent, and the next morning, it was beautifully white and very solid.

I did sand it just a little to try to remove some of the lumps that remained, but it was very difficult. The lumps were extremely stubborn.
Time to add my third layer. I knew I would be using a vintage Peter Pan book, but because I have an issue tearing pages from any books, let alone vintage books, I made copies of all of the pages I wanted to use. This helped to keep the ship very white because had I used the original pages, it would definitely be more yellow.
I was very meticulous when choosing the pages, trying to focus on scenes or sayings people would recognize from Peter Pan.


My book also had great illustrations too!

Here are a few photos of how I incorporated the pages on to the ship.


After I finished the hull, it was time to work on the sails. I used scraps of fabric left over from my DIY Pirate Ship Shower Curtain (which were already scraps left over from previous projects).


You will notice that I kept all cuts very rough and raw–no hemming. I was okay if the material frayed a little, or there was string here and there, because I felt like it added to the whole pirate-ship feel.


I used an Ikea Rast drawer pull for the top of the dowel rod.


I cannot express how overly excited I was with this finished mobile! It turned out exactly how I wanted it to, and I did it all by myself! It really added a special touch to the bathroom.


Notice the two stars? It comes from the directions to Neverland, “Second star to the right, and straight on ’til morning…” but those aren’t J.M. Barrie’s original words, did you know? Disney actually added the word star in their 1953 version.
I thought it was cute nonetheless, and added them next to the mobile.

If you’d like to see more projects from my Pirate-Inspired Boy Bathroom, click the photo below.

Let me know what you think!

