Have you ever known exactly what you wanted in an item, but either couldn’t find it…or found it, but couldn’t stomach the price? Well, that’s precisely what I have been going through the last few months.
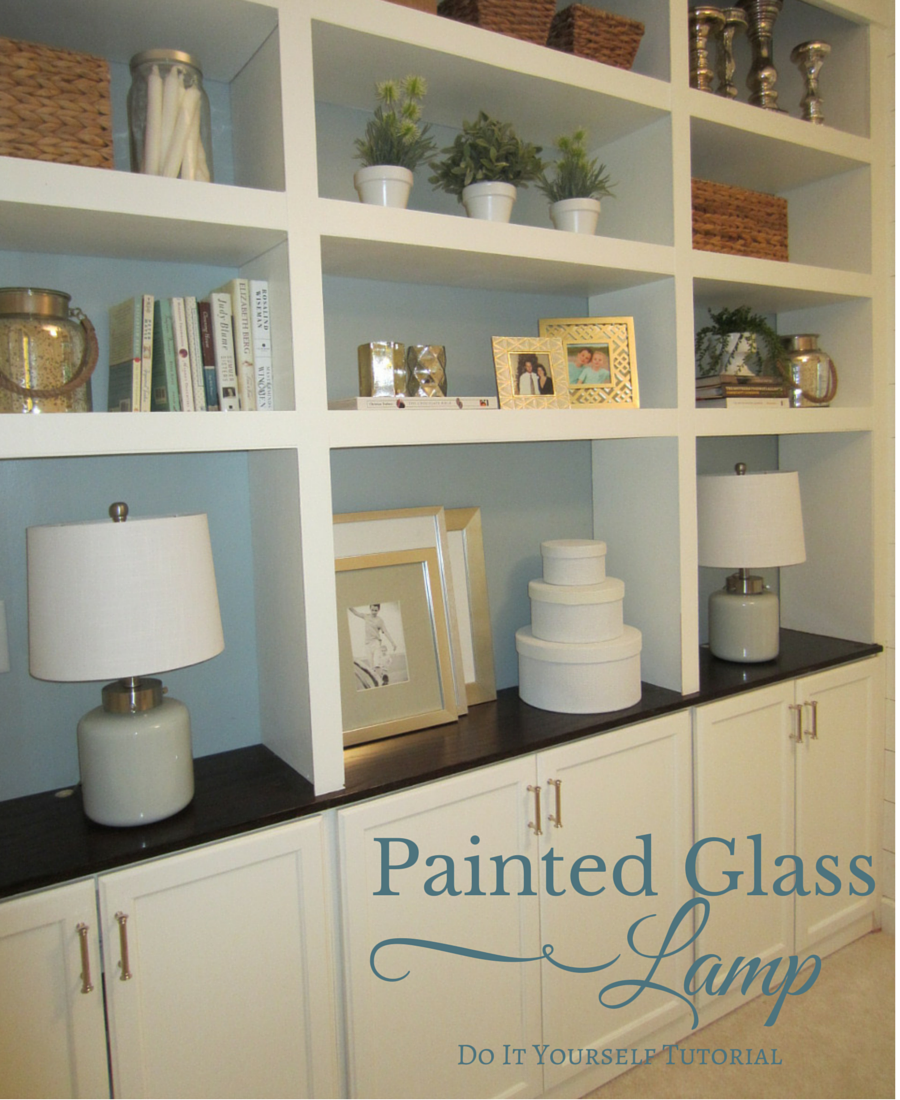
Early January, we had almost finished our office built-ins, and I knew I wanted to put two lamps on either end of the bookcases. I also knew the look I was going for. I wanted a glossy ceramic or glass base (preferably white, but I was willing to compromise on color). I began scouting out lamps all over the place. I made multiple visits to HomeGoods, TJMaxx, Marshalls, Target, World Market, and At Home! I visited online stores galore: Wayfair, Ballard Design, Pottery Barn, West Elm, etc!
I found lots of great lamps, but they were either too short, too tall, or too expensive. Usually, too expensive.
And then, one day, this crazy little thought entered my mind inspired by this….
DIY Painted Ornaments (seen here and here).
What if I stopped looking for a specific lamp, and just made my own? My search switched gears, and instead of looking for ceramic or colored-glass lamp bases, I started looking for a fillable lamp base. These are very popular right now, and I had no difficulty locating several almost immediately.


The only problem I had was that my lamp had to be under 23 inches in order to fit under the shelf.
Then I came across this lamp on ! Not only was it the right height for our built-ins, but the cord was on the outside (which was very important since I was planning to fill the thing with wet paint). I ordered two and waited patiently for them to come!
I have to say, when they arrived, I was very pleased. Almost too pleased…
Once I got them put together and on the shelf, they looked nice. I began to wonder if I really wanted to paint them.
Doubt is a scary thing in the creative mind.
Each time I walked by the office, I’d glance at the lamps. Did I like them clear? Did I really want to paint?
And then my mind would shout, “The whole reason you bought clear bases was to paint them! You didn’t want clear! You wanted glossy! You wanted color!! What is wrong with you, woman???”
Luckily for me, my creative mind is also very realistic. It reminded me of the following: if you hate it, just rinse the paint out.
I love it when my mind talks sense into me!
Thus, the lamps and I headed downstairs to find some paint. I chose white (Betsy’s Linen, to be precise) because white was the original color I had imaged my lamps being. (This is not what I will end up using, but more on that later…)
I added some paint to the lamp base.
Then I rotated the lamp base to allow the paint to slowly spread.
I continued to do this until the entire inside was covered, then placed it upside down in a small plastic container to drip.
It was time to do the second lamp base. Only I wasn’t sure if I wanted to do white. I know, it sounds a little loco. But seriously, the whole process of adding paint and rotating had taken less than 2 minutes. It didn’t seem like such a bad idea to try an actual color other than white to see if I liked it more.
So out came another one of my favorite Valspar colors, Smoke Infusion. And we did the whole process again.
The Smoke Infusion looked really, really pretty! So much so, I decided to rinse the white out of lamp base #1 and do it in color too. It look about five minutes to rinse the white paint out and start fresh.
Then it was time to let them dry. I left them upside down until they had stopped dripping. Then I turned them upright and wiped down the lip on both. I left them overnight to dry completely on the inside.
I am pretty happy with how they turned out!
Kelly
Check out more cool lighting ideas on my Pinterest Board.
This post is linked up at The Inspiration Gallery. Click below.


