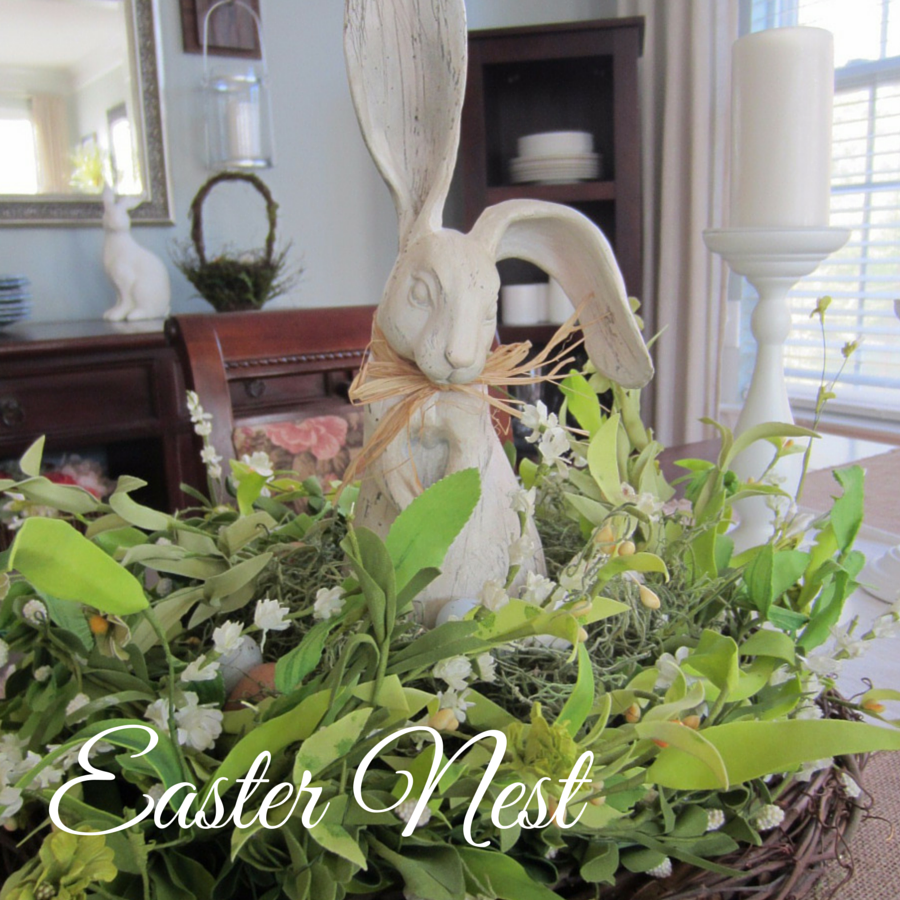
So, I originally saw this on Pinterest via On Sutton Place and absolutely fell in love with it!!! I thought it was the sweetest idea for a centerpiece. And luckily for me, when I went to Hobby Lobby, I found the exact same rabbit. You can imagine my excitement! ( By the way, Hobby Lobby has since gotten the same rabbit in a different pose, and don’t think for one second that I didn’t consider popping him in my cart and bringing him home too).
This is pretty simple to make. My version is just a little bit different, so I’ve included my steps here.
1. Start with a grapevine wreath.

2. Set your bunny in the center.

3. Add a Styrofoam ring.
As you can see, mine has been used over and over the last few years. This is where you will eventually add your individual floral pieces.

4. Add Spring Garland
If you don’t find a garland you like, check out the version on On Sutton Place. She does it a little bit differently, and it is still beautiful.

5. Tuck ends of garland into the grapevine wreath.
I’ve used this centerpiece that last three years (I told you I love it). Once Easter is over, however, I like to use this garland on my mantle throughout Spring. Therefore, I don’t use any wires or hot glue during this process. I simply find a little nook in the wreath and nudge the stem right on in. It holds the garland in place, and it’s easy to remove afterwards.


6. Add a Bed of Moss
Surround the bunny with moss. This covers up the Styrofoam ring and gives you a place to add any robin’s eggs later.


7. Add a few wisps of flowers and some eggs
I like to add a few floral stems around the bunny, as well as some eggs. I simply stick the stems into the Styrofoam ring we added earlier. I like to add them at an angle. You can see this really well in the last phone. Then I add a few eggs to the moss.

So Easy…So Sweet


Happy Easter!
Follow my on Pinterest.
Love this centerpiece! The rabbit is adorable.