I’m having a little love affair with anything gold lately. Just check out my board on Pinterest, and you’ll see just how much I adore all things that glitter and gleam.
Anyway, this latest craft popped into my head just the other night as I was enjoying some me time wandering the aisles at Hobby Lobby (I may or may not have spent two fabulous kid-free hours just browsing anything and everything the HL had to offer).
This little adorable print kept catching my eye.

You may recognize the play on words from Maurice Sendak’s . I thought it was so cute, and I was tempted to buy it, but then that little voice said, like it often does, “You know you can make that, Kelly.” And I didn’t put it in my cart. But I thought about it. And I thought about the package of Gold Leaf I had at home that I still hadn’t attempted to use. Would that work? But no, I decided it would be too hard to get the glue to behave the way I’d want it to. I knew how super frustrated I’d get if it didn’t look the way I imagined, and quickly talked myself out of it.
And then, in the same visit, I came across this! (Do you hear the angel choir?)

I may not be very good a managing glue, but I am a rock star with ink. And that Gold Leaf Pen was just begging to be put in my cart. I will warn you though: it is not cheap. That little gold stick of glamour cost me nine dollars!
On the ride home, I started thinking about what I’d like my art to say. While I did like the Hobby Lobby print, there was a part of me that knew it could possibly lead to some exhausting conversations with Version 2.0. What does that mean, Mommy? Why do you want to eat me? Are there really monsters? Why do monsters like to eat kids? I want to sleep in your room tonight, Mommy! Agh!
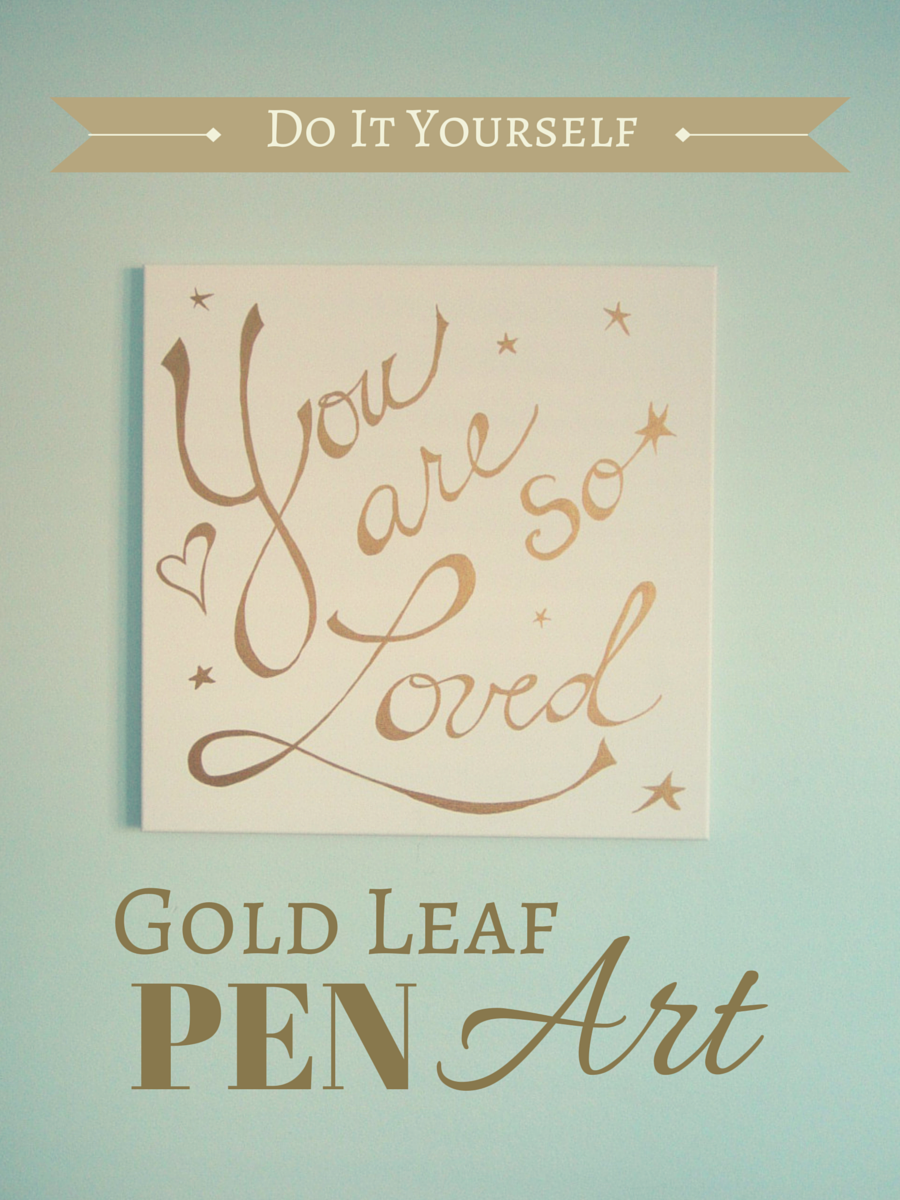
Then I remembered a “You are so Loved” decal I saw on Pinterest (find it here on MiniStyle). I say it to my kids all the time, and thought it was so precious, but couldn’t justify spending $70 on a sticker for our playroom. That was the perfect quote to use for my upcoming craft!
Gold Leaf Pen Art (Quick) Tutorial
Gather your supplies: 1 Canvas and 1 Gold Leaf Pen (can’t get any easier than that, right?)

The pen works like most paint pens. Shake well and press down on the tip to get the ink flowing. I practiced writing with it a few times on some cardboard. Once I felt comfortable, I wrote the first letter.

Then I slowly started adding weight to the letter Y.


Once I liked the thickness, I finished the rest of the word, and slowly started adding thickness to each letter until I was happy with the way it looked.

Because I actually wanted You and Loved to be main focus of the print, I decided to skip the middle two words and go right to Love. That way, I knew I’d get it the size I wanted, rather than having to try to fit it in later.

After I wrote the letter (just quickly in normal handwriting) I went through and outlined it again, but sometimes moved the line away from it to add dimension (as seen below). Then I’d go back and fill in the middle areas.

I’d also bring lines out like this:

After the L looked the way I wanted it, I wrote the rest of the word and went through the whole process again.

I tried to make each letter have a thin side and a thicker side.

I added the words are and so next.

And because I loved the stars used on the gold decal, I also added some to mine.

To make the stars a little more whimsical, I did not try to keep the sides symmetrical.


I am so happy with the way it turned out! It is going in the boys’ playroom.

Hope that added a little more glam to your day. Thanks for stopping by!
Kelly
This post is linked up at The Inspiration Gallery.